Page 5 of 21
Re: SWERVE - 1972 MWB Soft Top
Posted: Wed Jul 03, 2013 8:43 pm
by Swerve
Tuesday 8th May 2007
Went round to another G60 person’s place tonight to borrow a Marks 5 Speed clutch plate. Had a good chat about Patrol’s and PTO’s. Now understand how my PTO works (inners and outers) and will now try and get it going. Wasn’t sure before but much more confident now.
Also good tip for those who want to flare the rear guards place a piece of 4x2 inside above the wheel arch and jack it off the chassis/ inner well. You can get a very good 1” flare.
Steve
Wednesday 9th May 2007
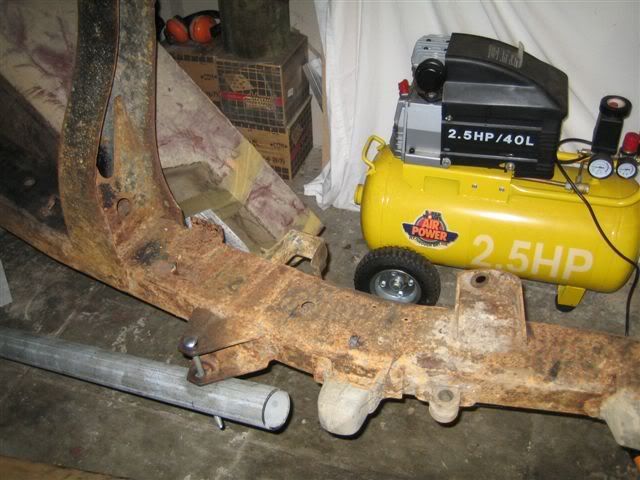
Well got home and started to panel beat the remaining crossmember into a square and straight shape (well sort off). Once this was in shape I cut out some cardboard into the respective shapes to fill in the missing crossmember.
During this process of ducking in and out from under the chassis my head decided to collect the front PTO shaft mount which is a piece of 6mm x 50mm flat bar stick from the inner left and chassis rail. Well as I came up from the duck (BUMP), sure enough my bald noggin hit it on the RHS temple and dug a deep gash in my head.
After going to the doctor and waiting a hour to get three stiches, came home and finished the templates. Ready to start shaping the new crossmember tomorrow night.
Photos from tonight.
Steve
Head aftermath (No challenge against a Patrol)
 Bit of protection so it doesn’t happen again
 One of the straighter crossmember mounts
 My new cardboard templates

Re: SWERVE - 1972 MWB Soft Top
Posted: Wed Jul 03, 2013 8:44 pm
by Swerve
Saturday 12th May 2007
Well did some shaping and welding of the crossmember during the week. Having never welded before this has been a learning experience. Reading some how to weld articles yesterday made a big difference.
Today have the crossmember shaped up and welded and tacked in place. The bottom and sides are not welded. Front section only tacked in place and main peice welded up top.
Once all of this is in place and welded, will then cut out the piece for the front tail shaft to drop into. Will then cover this by a plate across the whole top piece and gusset the sides and bottom. Hopefully I can get one of my mates who can actually weld to do this.
Also spent 3 hours or so with the wire brush on the 5” grinder removing rust and paint. Hands were absolutely buzzing by the end.
Will need to drag the long range tank I have from the shed to also place in position and weld any mounts in place before painting. Also want to put a water tank in place as well (But need to work out a space and buy one).
Photos from today.
Steve


Re: SWERVE - 1972 MWB Soft Top
Posted: Wed Jul 03, 2013 9:45 pm
by bosque
Dang Steve!!! That bash on your head looks like a doosey, ouch!

Re: SWERVE - 1972 MWB Soft Top
Posted: Thu Jul 04, 2013 5:38 am
by Swerve
bosque wrote:Dang Steve!!! That bash on your head looks like a doosey, ouch!
Bad feeling when you know it was bad, can't feel it. Then the blood starts dribbling down your head

There is still the toe injury to post
Re: SWERVE - 1972 MWB Soft Top
Posted: Thu Jul 04, 2013 5:39 am
by Swerve
Sun May 13, 2007 11:38 am
Well my welder mate came over and had a look at my crossmember. I also found some other issues this morning, that my front left spring mount is about to fall off. There is a crack around 80% of the mount.
We then decided to trailer it to his place 8km away to use his workshop and TIG. He took off and got a box trailer, while I removed the rear axle with the help of a angle grinder. One more dead spring

Mate came back and we placed it on the trailer (small 6x6 box) and decided this wasnt going to work (dam draw bar was way to short). Anyhow we placed the chassis back the garage and will organise another weekend (possible two weeks away as 4wdriving next weekend) to complete the work. I will in the mean time prep everything and get ready for him.
Will give me a chance to get the axles & springs off the green G60 and prep for the chassis.
No photo's worth looking at, other then the ones from yesterday on the previous page. Since decided to post some up up of teh crack
Steve


Re: SWERVE - 1972 MWB Soft Top
Posted: Thu Jul 04, 2013 5:42 am
by Swerve
Sun May 13, 2007 9:07 pm
67l60 wrote:that crack will need some serious work to repair
be shure to drill all crack ends with small drill to stop the crack
then cut a groove to the entire crack to allow the weld to flow and penetrate the crack 8) a surface weld will just continue to crack if you dont take these steps also get the frame red hot with a torch before welding helps to burn off impurities that will weaken the weld
butt its a good thing you found it now
maybe thats were you jamed youre head
Thanks for that John, just glad I have my mate lined up who’s been a professional welder for years. Also a 4WD head so that’s good.
I feel much happier having him do it as I know it will be stronger then new. he also noticed the original frame was stick welded (Can see slag remains) and have found some original welds that need redoing as well.
Going to also weld some mounting plates on the chassis, for my rock sliders and rear bar to mount to.. The barwork won’t be completed until after rego, then body lift as it will run the same width as the body in the 2” gap from the body lift. So it should look clean, but if I drag a sill off road, panels will remain straight.
Have also decided to install the long range tank in front of the rear diff on the left hand side. Again this will mount this up higher into the 2” BL gap. Need to arrange mounts for that to. Also for the water tank which will sit above the tailshaft on the right handside.
Steve
Re: SWERVE - 1972 MWB Soft Top
Posted: Thu Jul 04, 2013 5:43 am
by Swerve
Sunday 27th May 2007
Well finished the trolley for the chassis so I can wheel it outside and start prepping for welding, long range tank brackets, crack repairs, crossmember, water tank brackets, slider and rear bar brackets.

Last night pulled the MQ discs up and started to tear it down again. Still stuck with the 3mm allen key bolts for the freewheeling hubs. Need to get a oxy, or try boiling water first to expand the steel.

Went to the wreckers today and started looking at other spring lengths for lift ideas. Here is a quick table of my progress. I reckon you could go a 1”-2” less then standard length as both shackles on my are heading 45 degrees away from the diff.
Looks like the MQ front springs will fit the G60 front springs. Rear possible LandRover 110 or 50 Series cruise rear springs.

Re: SWERVE - 1972 MWB Soft Top
Posted: Thu Jul 04, 2013 5:48 am
by Swerve
Monday 28th May 2007
_____________________
Good news worked out where that bloody long range fuel tank goes.
The bloke said it replaces the original tank. So I tried fitting it there and all the mounting plates don’t line up with anything. (Sort off) Then tried placing it infront of the diff going over the tailshaft.
Worked out it will fit but have to remove the brake line mount, what looks like a exhaust mount on the right side chassis rail and another little 2 hole bracket on the left side chassis rail. All bolt holes line up really well with front mount bolt onto the crossmember below the tub/ floorpan join, rear mounts bolt through chassis rail.
Good thing is that I could check all measurements on the green G60 out the front. Took a variety of measurements and main concern was the tailshaft would hit the tank on full compression. I will also raise the tank another 1” or 2” with the body lift. Will have exactly 1” between tank and chassis rail. Also tank sits 1” above spring bolt (rear spring front mount) If I tuck it up 2” tank only hangs 1” below chassis rail.
Steve
Trial fitting in original tank position

 Clearance for new position
 Mounts to cut off

Re: SWERVE - 1972 MWB Soft Top
Posted: Thu Jul 04, 2013 5:48 am
by Swerve
Monday 28th May 2007
_____________________
Good news worked out where that bloody long range fuel tank goes.
The bloke said it replaces the original tank. So I tried fitting it there and all the mounting plates don’t line up with anything. (Sort off) Then tried placing it infront of the diff going over the tailshaft.
Worked out it will fit but have to remove the brake line mount, what looks like a exhaust mount on the right side chassis rail and another little 2 hole bracket on the left side chassis rail. All bolt holes line up really well with front mount bolt onto the crossmember below the tub/ floorpan join, rear mounts bolt through chassis rail.
Good thing is that I could check all measurements on the green G60 out the front. Took a variety of measurements and main concern was the tailshaft would hit the tank on full compression. I will also raise the tank another 1” or 2” with the body lift. Will have exactly 1” between tank and chassis rail. Also tank sits 1” above spring bolt (rear spring front mount) If I tuck it up 2” tank only hangs 1” below chassis rail.
Steve
Trial fitting in original tank position
Clearance for new position
Mounts to cut off
Re: SWERVE - 1972 MWB Soft Top
Posted: Thu Jul 04, 2013 5:49 am
by Swerve
Tue May 29, 2007 2:25 pm
RMP&O wrote:You are making progress...good to see. I like the frame trolly, such a good thing to have. Glad to see you not half assing this and glad to see that x-member getting attention.
About springs....do not go shorter, try and go longer. The longer a spring the more it will flex. The shorter a spring the stiffer it is. I would even consider flipping the rear springs around to move rear diff back a touch and also improve flex. But since you have to do spring hanger repair why not consider reloacting them? If you relocate all the hangers you have a lot more options for springs, plus longer ones. Getting the old girl to flex a lot will take you a long ways on the trail. No locker available in front diff and there is only one drop in locker for the rear. Keeping all tires on the ground is going to help you as much if not more than lockers. Some things to think about or consider anyways...
I am eager to see the MQ disc conversion....I did say go for it without having done one myself.

The trolley is great and much better having the chassis sitting sideways, as I can access both top and bottom and both sides. Last night just wheeled it outside and spun it around and put it back in the garage. So I could work on the tank under the light.
Hopefully tonight (not to late) I can remove those brackets with the grinder and slot the tank in properly and mark up the holes. Would have been a little late at 11pm grinding in the garage, neighbours would have shot me. Not sure about the rear tank mounts which I assume I need to drill through the chassis rail. Thinking about getting some 10mm plate or so welded to the inside of the rail and then tapping holes in this at standard tank height, 1” and 2” heights. This way I can move the tank height if need be, incase the Body lift goes on later. Front holes just add or remove blocks with the lift.
After more looking at the Green springs will just chuck them on, or worst case buy a new 2” lift. Not real keen on moving hangers as can only call so many favours in. But the MQ/K front springs look like a perfect match.
Still have to get those bloody allan key bolts don’t remind me.
Steve