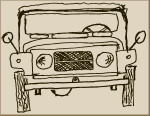
ckhorne's 1967 project

Builds, refurbishments, restorations, upgrades
User avatar
Patrol Fanatic!
Patrol Fanatic!
Posts: 3000
Joined: Sat Feb 23, 2013 11:28 am
Location: Lutherville, MD
Has thanked: 6010 times
Been thanked: 1600 times

Re: ckhorne's 1967 project

Post by Esteban »

Excellent progress. Congratulations. You've done a lot. :clap: :clap: :clap:

Great to hear about the condition of your engine. Even better for what you're doing.

Was fun to watch, almost in real time, the editing that you did to the picture with the cleaned engine bay. :clap: :clap: :clap:

Please mark the position of every cam lifter and it corresponding push rod.
Owner of the same Patrol since 1967
User avatar
You know you own a Patrol when…
Posts: 190
Joined: Wed Jan 01, 2014 2:14 pm
Location: Atlanta, GA, USA
Has thanked: 49 times
Been thanked: 141 times

Re: ckhorne's 1967 project

Post by ckhorne »

Esteban wrote:Excellent progress. Congratulations. You've done a lot. :clap: :clap: :clap:
Thanks, although I feel like I've taken on more than I can handle when I read faux40's thread.... :|
Please mark the position of every cam lifter and it corresponding push rod.
Yeah..... I didn't realize they were even in there until I flipped over the block on the engine stand and a few fell out. Good news is that I had cardboard below the engine, to catch any oil drips. Bad news is that I didn't mark which ones went where. Push rods, yes... lifters, no. My machinist took a look and said I should be ok, given the little wear, and that it's less critical than things like main or crank bearings. Chalk this one up to a beginner mistake... :doh:
User avatar
Administrator
Administrator
Posts: 2460
Joined: Wed Jul 03, 2013 11:49 pm
Location: Arizona
Location: Arizona
Has thanked: 800 times
Been thanked: 1269 times
Contact:

Re: ckhorne's 1967 project

Post by moore_rb »

Great progress... :handgestures-thumbup:

regarding the carbon on your pistons- from the images, that looks well within the "normal" category to me.

Now, the baked on oil residue and solidified sludge coating everything is another story- holy cow, that engine is DIRTY... makes me wonder if someone had left the spring out of the oil filter canister and allowed the oil to bypass the filter?

But at any rate- once it's rebuilt it should run like a champ - just take the time to clean the gas tank while the engine is out :)

Serious bummer about the water pump pulley :evil:
ImageImageImageImage

L-R:
White 65 Hardtop L60-3-00617 (undergoing restoration)
Red 65 hardtop 4L60-002565 (scrapped for parts)
66 Hardtop "El-Bondo Patrol", L60-00511 (Restored, then sold June2020)
Blue 67 Hardtop (sold March1997)
Green 62 Softtop L60-2-00504 (undergoing restoration)
User avatar
You know you own a Patrol when…
Posts: 190
Joined: Wed Jan 01, 2014 2:14 pm
Location: Atlanta, GA, USA
Has thanked: 49 times
Been thanked: 141 times

Re: ckhorne's 1967 project

Post by ckhorne »

moore_rb wrote:regarding the carbon on your pistons- from the images, that looks well within the "normal" category to me.
At least they cleaned up nicely with a little carb cleaner:
cleaned_pistons.jpg
Now, the baked on oil residue and solidified sludge coating everything is another story- holy cow, that engine is DIRTY... makes me wonder if someone had left the spring out of the oil filter canister and allowed the oil to bypass the filter?
The spring was there when I took it all apart, so I don't think that was it. But yeah.. there is gunk EVERYWHERE in this engine. The bottom of the oil pan had about 1" of sludge that had to be scooped out by hand....
But at any rate- once it's rebuilt it should run like a champ - just take the time to clean the gas tank while the engine is out :)
Brand new poly gas tank - it's about as clean as it'll ever get! :P
You do not have the required permissions to view the files attached to this post.
User avatar
Administrator
Administrator
Posts: 7814
Joined: Thu Oct 04, 2012 10:42 am
Location: Temecula, CA
Has thanked: 7688 times
Been thanked: 2476 times
Contact:

Re: ckhorne's 1967 project

Post by RiverPatrol »

Amazing how a little project snowballs like that. Great progress, especially with the limited space you have to work in. Keep up the good work. :D
Beyond any hope for intervention

Image
User avatar
Administrator
Administrator
Posts: 1225
Joined: Sun Jul 28, 2013 12:45 am
Location: Roseville, California
Has thanked: 646 times
Been thanked: 1149 times
Contact:

Re: ckhorne's 1967 project

Post by faux40 »

ckhorne wrote: Yeah..... I didn't realize they were even in there until I flipped over the block on the engine stand and a few fell out. Good news is that I had cardboard below the engine, to catch any oil drips. Bad news is that I didn't mark which ones went where. Push rods, yes... lifters, no. My machinist took a look and said I should be ok, given the little wear, and that it's less critical than things like main or crank bearings. Chalk this one up to a beginner mistake... :doh:
I know EXACTLY how you feel! My motto is "we do it right, 'cause we do it twice!"

I think that you'll be okay with the lifters -- My machinist prefers to keep them in order, but says that he doesn't worry too much when lifters they come in mixed up (like ours did!).

Good luck! This stuff is a lot of fun!

John
User avatar
Administrator
Administrator
Posts: 2460
Joined: Wed Jul 03, 2013 11:49 pm
Location: Arizona
Location: Arizona
Has thanked: 800 times
Been thanked: 1269 times
Contact:

Re: ckhorne's 1967 project

Post by moore_rb »

faux40 wrote:
I think that you'll be okay with the lifters -- My machinist prefers to keep them in order, but says that he doesn't worry too much when lifters they come in mixed up (like ours did!).
Agree - the P engine has solid lifters, so matching them to specific cam lobes is a "best practice" but not a mandatory one...

If the pushrods spin when the engine is running, then the lifters are working just fine
ImageImageImageImage

L-R:
White 65 Hardtop L60-3-00617 (undergoing restoration)
Red 65 hardtop 4L60-002565 (scrapped for parts)
66 Hardtop "El-Bondo Patrol", L60-00511 (Restored, then sold June2020)
Blue 67 Hardtop (sold March1997)
Green 62 Softtop L60-2-00504 (undergoing restoration)
User avatar
You know you own a Patrol when…
Posts: 190
Joined: Wed Jan 01, 2014 2:14 pm
Location: Atlanta, GA, USA
Has thanked: 49 times
Been thanked: 141 times

Re: ckhorne's 1967 project

Post by ckhorne »

I got my engine back from the machinist last night. He ended up taking a fair amount off the head to get everything flat, but I should be good to go with the block. And so starts the re-assembly.
photo 1.JPG
First up was the rope seal. From other threads I've seen here, I knew the rope seal would be a pain, so I budgeted the rest of yesterday evening. After a bunch of blood, sweat, and tears... I made no progress. Working with a buddy, we finally had the idea of using one of the old main bearings, which was nearly the correct diameter, and using a rubber mallet flipped over (so the rubber was on the bearing), and then hammer in the handle of the mallet. This seemed to work well.
photo 2.JPG
And I ended up with it installed. It was nearly the same diameter as the main bearings, so I think it'll work.
photo 3.JPG
So after a great deal of cleaning with brake cleaner and a lint-free cloth, we got in the new main bearings, the crank itself, and the main bearing caps, all set with assembly lube:
photo 4.JPG
photo 5.JPG
I checked the movement of the crank as I went, and it spun relatively easily by just grabbing the end and turning it by hand. The assembly lube is really thick and sticky, so I'm guessing it'll spin better once it's running with regular oil.

However, when I got to the rear cap and torqued it down, it got VERY tight. I torqued all the main bearing bolts to 75 ft lbs, and then backed off the #6 cap (with the rope seal). At 25 ft lbs per cap bolt on #6, the crank spun with relatively little effort. At 50 ft lbs, it took maybe 30-40 ft lbs to spin the crank. At 72 ft lbs on the bolts, it takes 80-100 ft lbs on the crank to turn it.

At this point, I'm afraid to go any further because things are so tight. Is this what everyone else has experienced? I really, really don't want to have to take everything back out and try to install that rope seal in any further, but I'm afraid that if I go forward, I'll end up kicking myself. Can anyone help? :(
You do not have the required permissions to view the files attached to this post.
User avatar
Administrator
Administrator
Posts: 7814
Joined: Thu Oct 04, 2012 10:42 am
Location: Temecula, CA
Has thanked: 7688 times
Been thanked: 2476 times
Contact:

Re: ckhorne's 1967 project

Post by RiverPatrol »

Great pictures, great progress! Thanks for sharing your technique for the rope seal. :clap:

Don't be afraid to tighten the rear cap to the necessary torque. It is common for it to be very hard to turn over because that rear bearing and rope seal make everything tight. It loosens up real quick.
Beyond any hope for intervention

Image
User avatar
Administrator
Administrator
Posts: 1225
Joined: Sun Jul 28, 2013 12:45 am
Location: Roseville, California
Has thanked: 646 times
Been thanked: 1149 times
Contact:

Re: ckhorne's 1967 project

Post by faux40 »

ckhorne wrote:
I checked the movement of the crank as I went, and it spun relatively easily by just grabbing the end and turning it by hand. The assembly lube is really thick and sticky, so I'm guessing it'll spin better once it's running with regular oil.

However, when I got to the rear cap and torqued it down, it got VERY tight. I torqued all the main bearing bolts to 75 ft lbs, and then backed off the #6 cap (with the rope seal). At 25 ft lbs per cap bolt on #6, the crank spun with relatively little effort. At 50 ft lbs, it took maybe 30-40 ft lbs to spin the crank. At 72 ft lbs on the bolts, it takes 80-100 ft lbs on the crank to turn it.

At this point, I'm afraid to go any further because things are so tight. Is this what everyone else has experienced? I really, really don't want to have to take everything back out and try to install that rope seal in any further, but I'm afraid that if I go forward, I'll end up kicking myself. Can anyone help? :(
My machinist couldn't get the patrol rope seal into his satisfaction. We even ordered a second one just for giggles and it too was nearly impossible to install and then once in, the crank wouldn't turn without a ton of effort. The kind of effort that we worried that the starter wouldn't be able to overcome. We elected to use a Chevy rope seal instead. It went in well and once in and torqued, the crank turned with reasonable effort. I'll be seeing him Tuesday. I can ask which Chevy rope seal he used if that helps.

On the other hand, the guy from Datsun 311 Parts says that it's supposed to be really tough to get those in... I believe my machinist.

John
Post Reply