How To - Valve Adjustment

Posts by members with instructions on how to do certain mechanical projects.

Postby G60michael » Mon Sep 02, 2013 5:00 am

Hi all 60'ers,

I have Put together a Step-by-Step 'How too" on how to adjust the Valve Clearances on an Original G60 "P" Engine, and hope It can help fellow patrol-ers out in someway :)

STEP 1: GATHERING THE REQUIRED EQUIPMENT
To Adjust the Valves on your patrol you will only need a Handfull of Tools,as it is very simple.
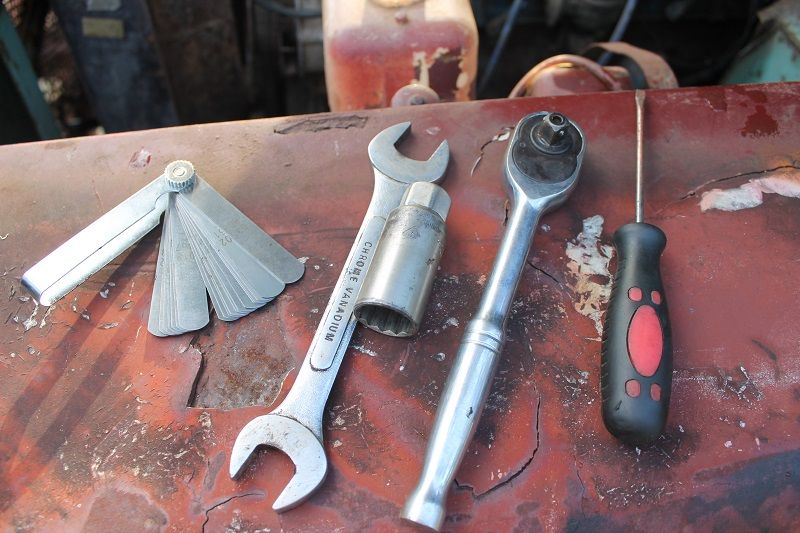
The required tools are
- A set of Feeler Guages. The Required specified size feeler guage is 0.015 inch/0.38 mm
- A 9/16 Open end or Ring Spanner (Ring Spanner is more Suitable)
- A Flat Bladed Screwdrive
- Spark Plug Socket
- Shifter
- Ratchet
Image

STEP 2 : GETTING STARTED
When adjustign Valves it is important to have the Engine above 80 Degrees Celcius/Operating Tempreture. So take it for a Quick spin around the Block for about 5-10 minuets. Now with a nice Hot engine,its time to get Started re-adjusting the Valves.
First off you will need to Remove the Valve Cover from the Top of the Engine. When removing the Valve cover move the heater hoses and any other leads that may run over the valve Cover out of the way and be carefull if hoses are brittle and could be damaged,with the valve cover removed you ready for the next step.

STEP 3 : REMOVING THE SPARK PLUGS
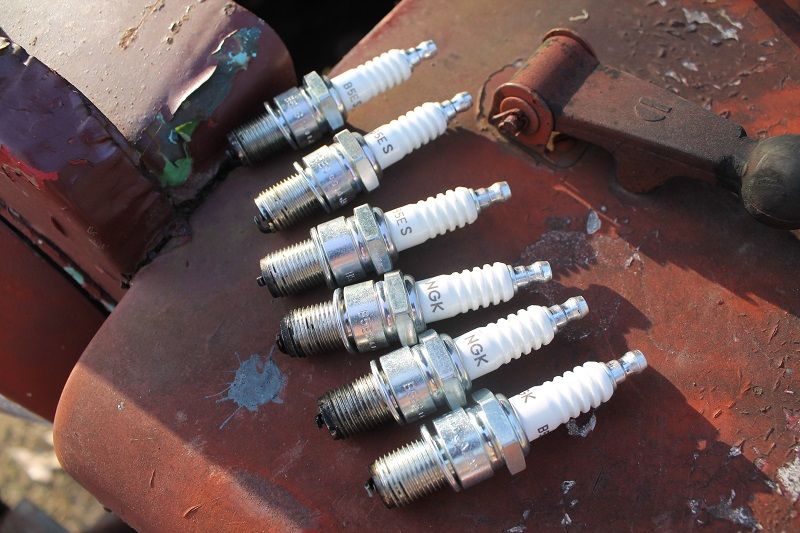
This step isnt really necessary but it makes it alot easier to Find TDC and is a hell of a lot easier to wind the engine over by hand. You will need the larger Size Sparkplug socket and a ratchet for this Step. Now Remove all 6 Plugs from the head,and place in order on a Clean rag away from your working area.
Image


STEP 4 : FINDING TDC #1Its in this step when your Feeler Guages (correct clearance is 0015/0.038) Your 9/16 Spanner and you Flat Bladed Screwdriver will get used.
Firstly Before Doign anything you NEED to set the engine to TDC, Cylinder 1 on Compression Stroke.
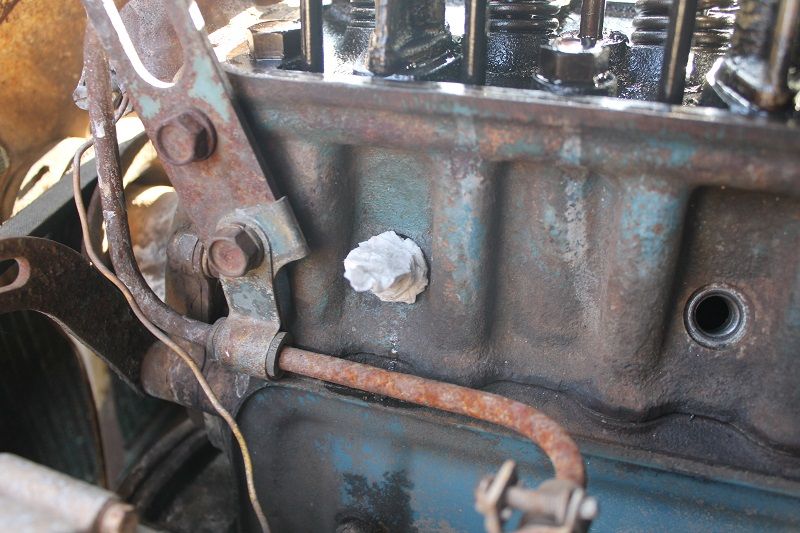
The Easiest way i do this to find TDC Compression on Cylinder #1 is place a Wet rolled up bit of Toilet paper into Cylinder #1 Spark plug hole. Now wind the engine over till Compression occurs and the Toilet paper will Blow out of the Hole. You know know its on the Compression Stroke,slowly wind the engine over till the Pistons reaches the very top of its travel and place your screw driver down the Sparkplug hole to make sure its on TDC. Also check the Timing marks on the Harmonic Balancer on the front of the Engine.
Image

STEP 5 : 1st STAGE OF VALVES TO ADJUSTWith the engine set up on Cylinder #1, TDC Compression Stroke its time to adjust the valves.
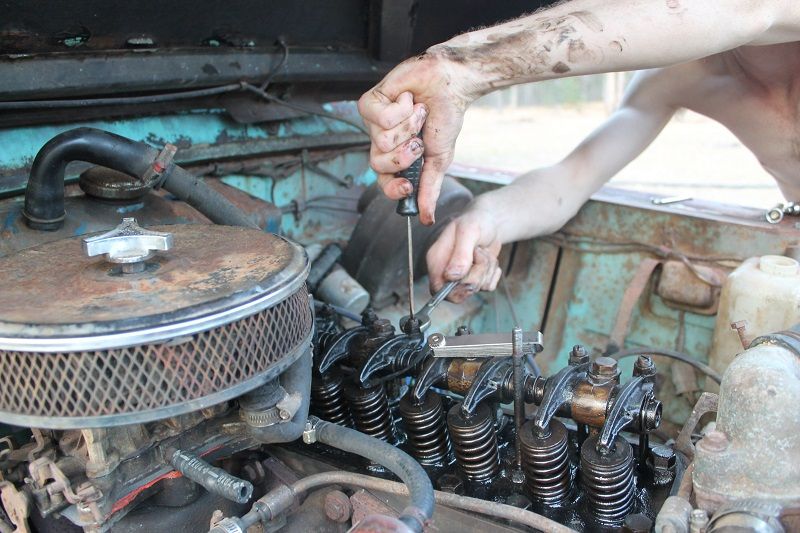
Using your Spanner Crack the Lock nuts Only on Valves 1,2,3,6,8,9 Only do 1 Valve at a Time.
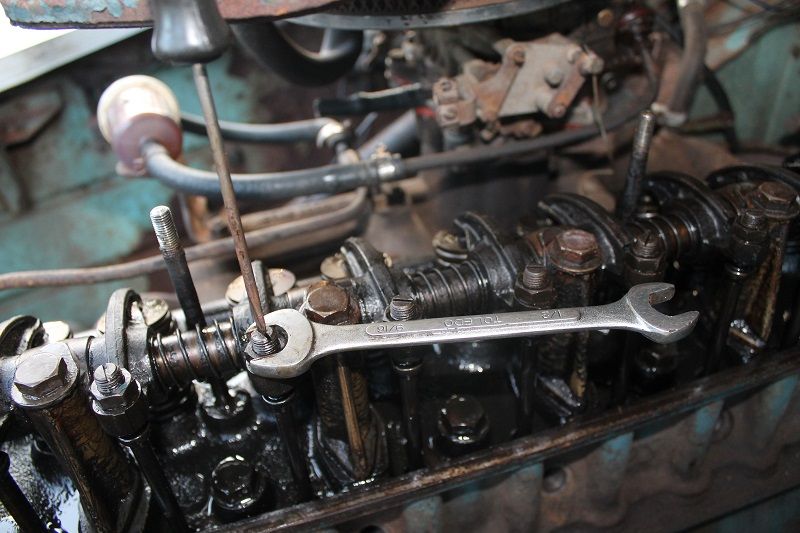
Now with the Valves Lock nuts Cracked,place your feeler Guage ( 0015/0.038) Between the Rocker Arm and the Top of the Valve. Now Slowly Turn the Adjusting Screw till the Feeler Guages are closed Between the Valve and the Bottom of the Rocker Arm,Be sure not to clamp the Feller Guages in there. Correct clearance is Set with slight drag on the feller guages.
Now when the Correct clearance is set,holding the Screwdriver tight ,and with your other arm tighten the Lockign nut. Re-Check you adjustment after you do each Valve.
NOTE: Do Not overtighten the adjusting screw. The Correct Clearece is Set with Slight Drag when there is Friction on the Feller Guages from the Rocker Arm and top Of Valve.
Now With the First Stage of the Valves 1,2,3,6,8,9 all Adjust its onto the next Step
Image

STEP 6 : 2nd STAGE OF VALVES TO ADJUST
Now to adjust the other 6 valves you need to Set the engine up again.
This Time TDC Cylinder 6 on Compression stroke
With the engine set up on Cylinder 6 ,TDC Compression Stroke its time to adjust the remaining valves.
Using your Spanner Crack the Lock nuts Only on Valves 4,5,7,10,11,12 Only do 1 Valve at a Time.
Now with the Valves Lock nuts Cracked,place your feeler Guage ( 0015/0.038) Between the Rocker Arm and the Top of the Valve. Now Slowly Turn the Adjusting Screw till the Feeler Guages are closed Between the Valve and the Bottom of the Rocker Arm,Be sure not to clamp the Feller Guages in there. Correct clearance is Set with slight drag on the feller guages.
Now when the Correct clearance is set,holding the Screwdriver tight ,and with your other arm tighten the Lockign nut. Re-Check you adjustment after you do each Valve.
Image

STEP 7 : RE-ASSEMBELY

Now with all the valves adjusted to the Correct clearance,it time to reassemble the parts you removed earlier.
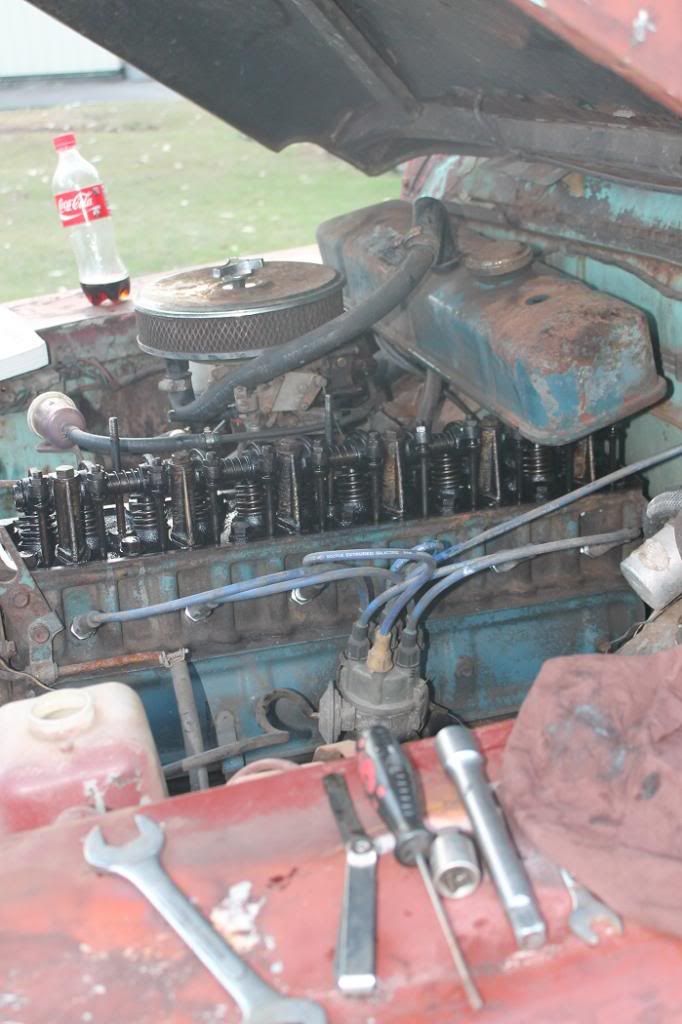
Re install the Spark plugs till there in there Firmly and try not to snap the plug on installation. Connect the Sparkplugs Leads and make sure there in the right sequence.
Reinstall your Valve/Tappet Cover, General procedure usually inludes replacing the Gasket ,however i have never bothered replacing any of mine and i havent had any issues. Tighten the 3 bolts that hold the valve cover down firmly. And Finally re-connect any Disconnected Hoses/Wires ect.
Image

STEP 8 : TEST DRIVE
Now with everythign back together,its time to take it for a Test Run. If there been done Correctly there shouldnt be any issues.
G60michael Offline

User avatar
I love driving my Patrol!
 
Posts: 716
Images: 798
Joined: Fri Dec 21, 2012 6:18 am
Has thanked: 140 times
Been thanked: 300 times
Location: AUSTRALIA

Postby sleepyzzz » Mon Sep 02, 2013 7:13 am

nice write up and pictures.
1967 SPL 1600
2013 Nissan Rogue
2001 Nissan Sentra SE R
2010 Nissan Frontier SE V6 burning LP
sleepyzzz Offline


You know you own a Patrol when…
 
Posts: 300
Joined: Thu Dec 13, 2012 6:47 am
Location: NW Arkansas
Has thanked: 12 times
Been thanked: 36 times
Location: United States

Postby RiverPatrol » Mon Sep 02, 2013 11:00 am

Excellent 'How-to' write-up with pictures to boot! :clap: :clap: :clap: Bloody awesome Michael, thank you so much for this great contribution! It's been made into a sticky so it will be easy to find.
Beyond any hope for intervention

Image
RiverPatrol Offline

User avatar
Administrator
Administrator
 
Posts: 7445
Images: 959
Joined: Thu Oct 04, 2012 10:42 am
Has thanked: 6809 times
Been thanked: 2297 times
Location: Temecula, CA

Postby IrishPatrol » Sat Sep 21, 2013 5:19 pm

Ok i just did this job as well. I still have a clacker! not sure what it is. I've actually done it now 3 times checking ,double checking. still a "clacker" not sure what it is. Any ideas.
IrishPatrol Offline


You know you own a Patrol when…
 
Posts: 205
Images: 2
Joined: Thu Jul 11, 2013 11:23 pm
Location: Yakima, Washington
Has thanked: 0 time
Been thanked: 46 times
Location: Washington

Postby Esteban » Sat Sep 21, 2013 5:42 pm

My dad use to do the valve adjustment with the engine running, which is an overkill, difficult and messy. But you can actually check the clearance with the engine running and the valve cover off. It's going to be a quick check, so leaks won't be bad. Use two adjacent feeler gauges of the spec and try each other separately at the gap. You'll probably can pinpoint the culprit.

Also at this point, you can check if oil dripping is happening at each one of the rockers.

Try to post a picture. Get one of the cheap auto stetoscopes at Harbor Freight. Will come handy always.
Owner of the same Patrol since 1967
Esteban Offline

User avatar
Patrol Fanatic!
Patrol Fanatic!
 
Posts: 2857
Joined: Sat Feb 23, 2013 11:28 am
Location: Lutherville, MD
Has thanked: 5589 times
Been thanked: 1441 times
Location: Lutherville, MD

Postby PatrolEnvy » Mon Oct 07, 2013 10:09 am

Nice writeup and it's according to the factory. But there is another way that I have used almost exclusively in my 45 years of working on engines, including 20+ as an ASE Master Tech.

Rotate the engine until you find the overlap on one cylinder. Overlap is the point on the exhaust stroke (engine rotated clockwise) where one rocker, the exhaust, comes up (exhaust valve closes) and the intake starts down (beginning of the intake stroke). You catch that place in the middle of those two events and the adjust BOTH valves on the cylinder exactly opposite in the firing order, which are on the heel (base circle) of the cam lobe. If you put #1 on overlap, you would adjust #6, if #2, adjust #5, etc. For pros, this method was used because you can start at any point without having to set up and rotate the engine all over to find TDC. It's just as accurate as the TDC method but if you don't have firing order and the Otto cycle deeply ingrained in your head, it can be difficult to grasp the first time and may seem harder.

Ticking can come from many sources, including worn/damaged rocker and/or valve tips (where you can't get an accurate clearance check with feeler gauges). The way around this is to use a dial indicator to set the valve clearance. A worn out rocker bushing/shaft can also cause a similar noise.

Still looking for a Patrol to shoot for Four Wheeler that's close to NW Ohio!!
Jim Allen
Keeping the Good Old Days of Four Wheeling Alive
PatrolEnvy Offline


Patrol Newbie
Patrol Newbie
 
Posts: 10
Joined: Wed Mar 20, 2013 11:35 am
Location: NW Ohio
Has thanked: 1 time
Been thanked: 13 times
Location: NW Ohio

Postby fijiland » Wed Mar 19, 2014 4:01 pm

Hello you guys, Getting ready to adjust the valves. Have looked on the forum for a place to buy valve cover gasket. Maybe I just missed it but,,,,,,,,,,is there a connection or part number that one of you guys might have? One member says he does not change his but would like to if possible. Thanks,

Dave
fijiland Offline


So, I just bought this Patrol….
 
Posts: 18
Images: 27
Joined: Fri Feb 14, 2014 3:41 am
Has thanked: 0 time
Been thanked: 9 times
Location: Temecula California

Postby RiverPatrol » Wed Mar 19, 2014 5:55 pm

This seller on eBay has a few Patrol parts, including oil and fuel filters. Here is the rocker cover gasket: http://www.ebay.com/itm/Nissan-Patrol-60-Series-Rocker-Cover-Gasket-/360387779289?pt=Motors_Car_Truck_Parts_Accessories&vxp=mtr&hash=item53e8c91ad9
Beyond any hope for intervention

Image
RiverPatrol Offline

User avatar
Administrator
Administrator
 
Posts: 7445
Images: 959
Joined: Thu Oct 04, 2012 10:42 am
Has thanked: 6809 times
Been thanked: 2297 times
Location: Temecula, CA

Postby fijiland » Wed Mar 19, 2014 6:27 pm

Danka shone. Just ordered it.

Dave
fijiland Offline


So, I just bought this Patrol….
 
Posts: 18
Images: 27
Joined: Fri Feb 14, 2014 3:41 am
Has thanked: 0 time
Been thanked: 9 times
Location: Temecula California

Postby Peter60 » Thu Mar 24, 2022 12:43 am

The tappet adjustment should be 0.015inch or 0.38mm

In Michael's How-To an extra zero has slipped in in a couple of places (0015/0.038). I got caught out by this.

Apart from that Michael's instructions a great.
Not sure if I will get there.
Not sure if I will get back.
But I usually do!!!
Peter60 Offline


You know you own a Patrol when…
 
Posts: 237
Joined: Wed Mar 18, 2015 2:33 am
Has thanked: 156 times
Been thanked: 240 times
Location: Canberra, Australia

Next

Return to How To's

Who is online

Users browsing this forum: No registered users and 1 guest